How to photograph birds in flight
Photographing birds in flight is one of the most rewarding areas of wildlife photography. When everything comes together, light, timing, and movement, the results can be incredibly satisfying. However, when I started in this genre I quickly discovered that many things can work against you; poor light, camera settings that need to change on the fly, and of course, birds that refuse to show up!
Over time I realised that improving my success rate came down to three simple habits:
Research and reading what other photographers were doing.
Experimenting with camera settings until something started working consistently.
A lot of practice.
Once you understand a few of the fundamentals, you’ll find that getting sharp, well-timed images of birds in flight becomes much more achievable.
This guide walks through the basics of how to photograph birds on the move, including general camera settings, autofocus techniques, positioning, and a few practical habits that I hope will help you avoid some of the mistakes I made as a beginner.
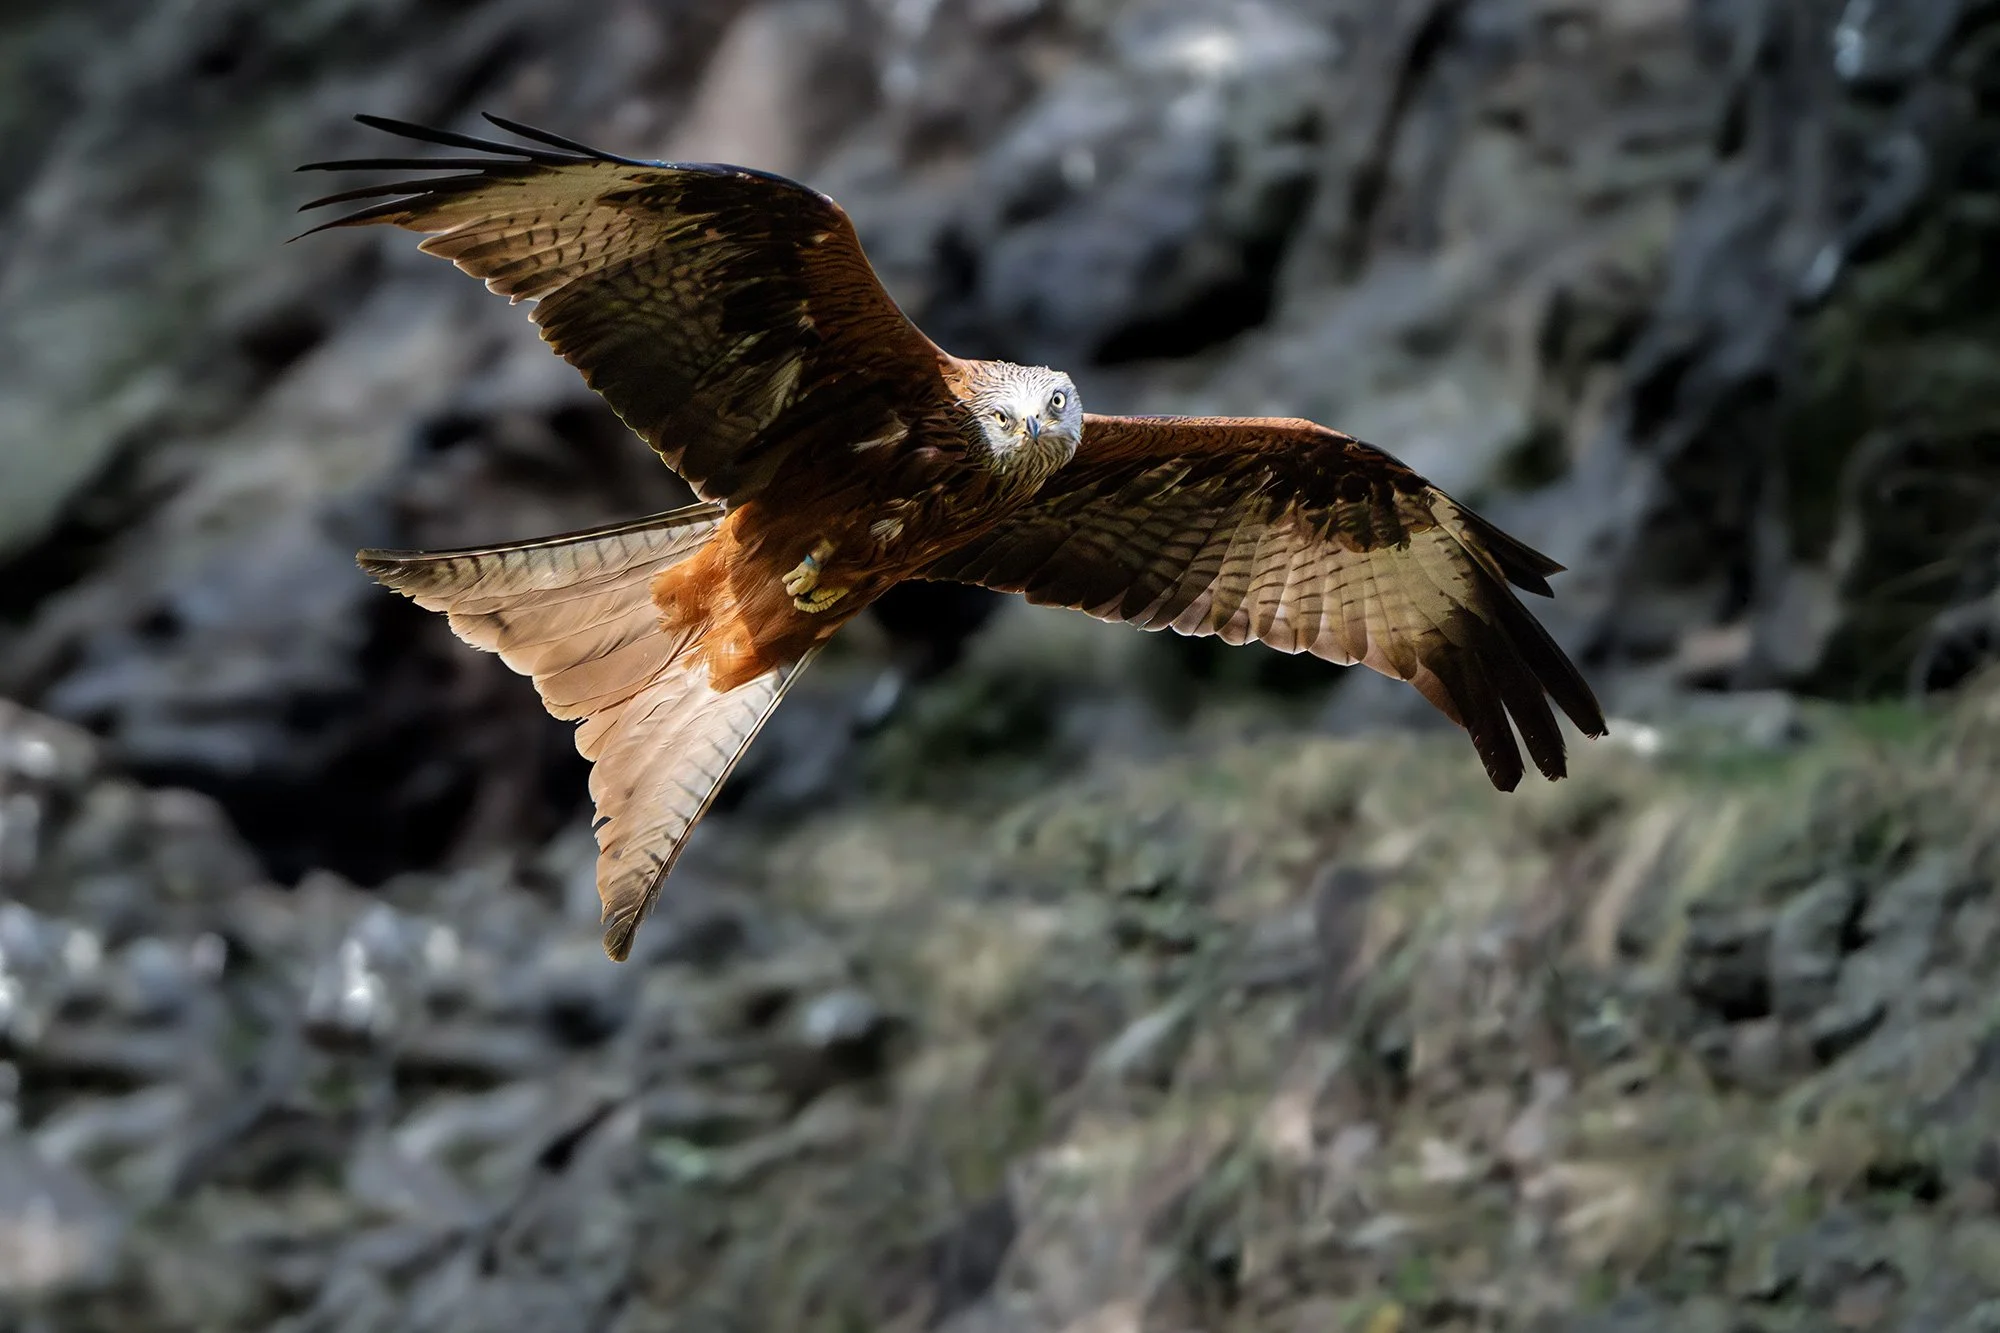
A red kite (milvus milvus) photographed in the Czech Republic. Camera settings: 1/3000 sec; f/11; ISO 2000. Image © Matt Garnett 2024
Respecting birds and their environment
Before getting into the technical side of bird photography, it’s worth mentioning something that often gets overlooked. Good wildlife photography always starts with respect for the animals you are photographing.
Birds rely on specific habitats for feeding, nesting, and resting. Disturbing these behaviours just to get closer to a photograph can cause unnecessary stress and sometimes even lead birds to abandon nests or feeding areas.
Try to keep a reasonable distance and always avoid approaching nesting sites. If a bird starts showing signs of distress, calling repeatedly, flying in circles, or repeatedly leaving and returning to a nest, take it as a sign that you are too close.
This is especially important during migration. Many birds travel enormous distances and depend on safe places to rest and feed along the way. If birds are repeatedly flushed from these resting areas, they may burn valuable energy that they cannot sufficiently replace.
A good rule of thumb is that if a bird changes its behaviour because of your presence, it’s time to step back. The goal is always to photograph natural behaviour without interfering with it.
Let’s start with the right camera settings
Getting your camera settings right when photographing flying birds for the first time can feel daunting, as there are many variables we need to consider. The general goal is simple though: freeze motion, keep the bird in focus, and maintain enough depth of field to help your subject stand out from the background.
Shutter speed is your key setting
The biggest mistake I made in my first year of bird photography was using a shutter speed that was far too slow for fear of underexposing my shots. But birds move quickly, and even small movements can become exaggerated, especially when using a zoom or telephoto lens.
In my experience a good starting point for your shutter speed is:
1/1000 or above for larger birds gliding slowly.
1/1600 to 1/2500 for most birds in flight.
1/2500 to 1/3200 for smaller birds like tits, swifts, etc.
In extremely fast-moving situations, such as a kingfisher diving into water, you may even want to try 1/4000 or higher. If in doubt, don’t be afraid to go for a faster shutter speed than you think you need - you’ll be surprised how well modern cameras perform even when you push your shutter speed to extremes.
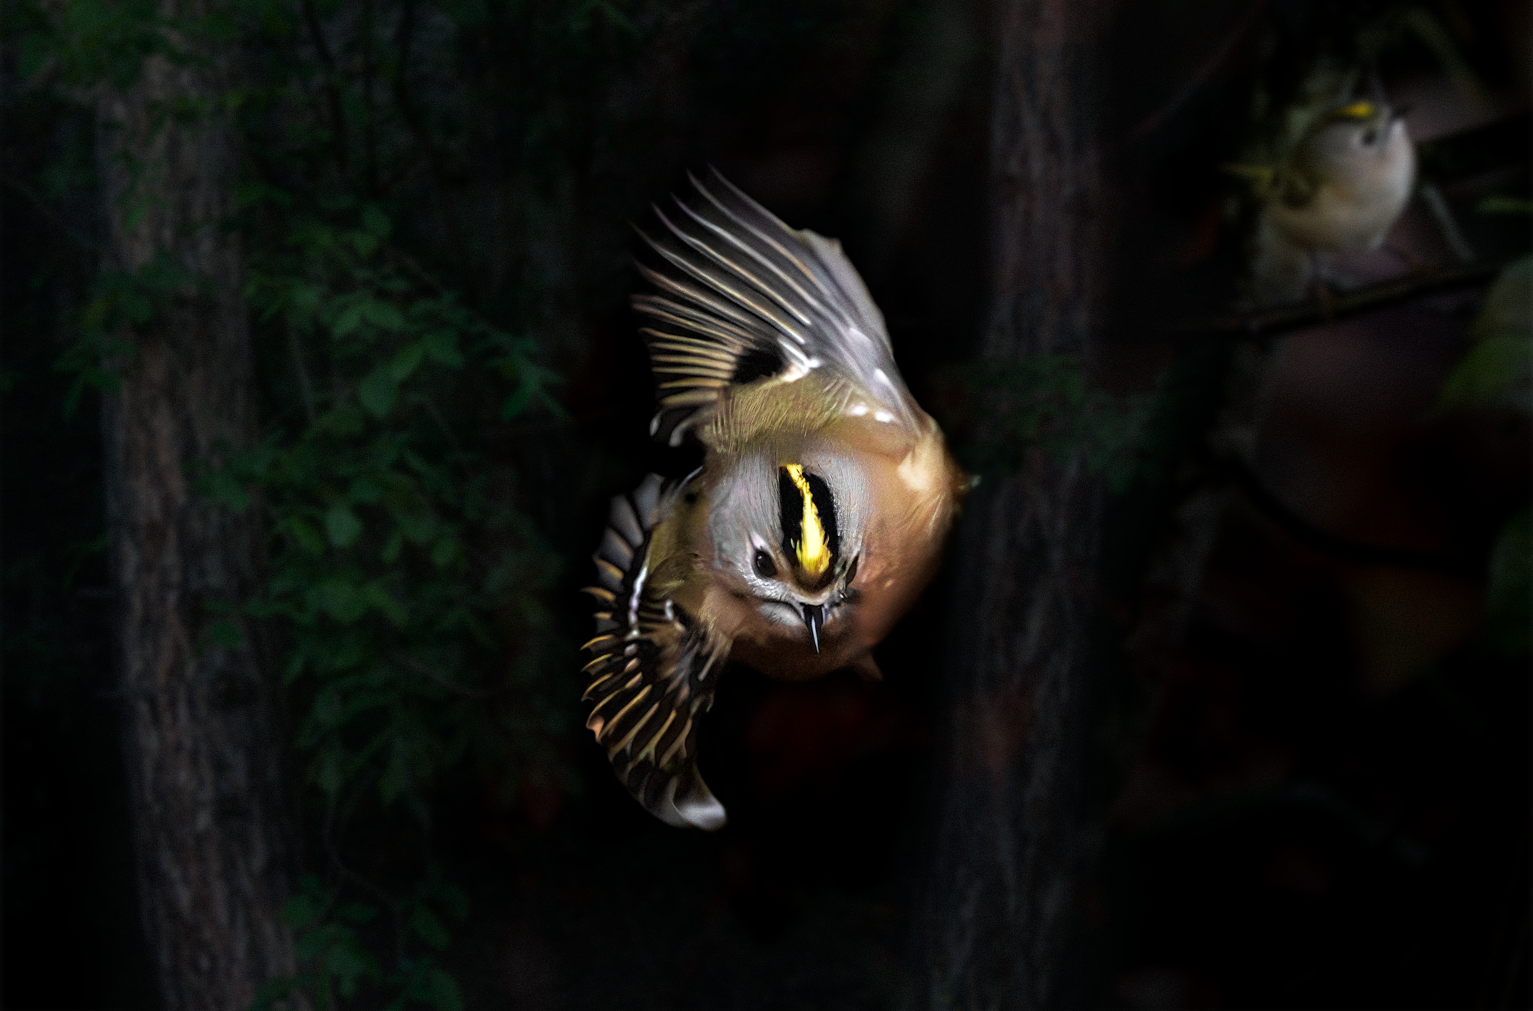
This goldcrest (regulus regulus) was photographed at 1/4000 sec; f/11; ISO 12800. Image © Matt Garnett 2024
This photograph of a goldcrest is what I might call a ‘lucky’ shot. As I noticed the bird was about to take off I raised my shutter speed as quickly as possible and fired a burst of shots, one of which thankfully came out in focus. Notice that my ISO here was at 12800, but I still came home with a useable image. Don’t be afraid to let your ISO go high when the situation requires it.
Let ISO work in your favour
Balancing exposure becomes much easier if you allow the camera to control ISO. Many wildlife photographers use Auto ISO while controlling shutter speed and aperture themselves. This way, the camera automatically adjusts sensitivity as the bird moves across bright or dark backgrounds.
Typical ranges might look like this:
Sunny conditions: ISO 100 to 640.
Overcast skies: ISO 800 to 2000.
Low light or forest environments: ISO 2000 and above.
The goal is always maintaining the shutter speed needed to freeze motion, so don’t be overly concerned about your ISO setting, particularly when you’re in shutter priority mode on your camera, which is my preferred mode in most situations. Modern cameras actually deal with high ISO settings extraordinarily well these days. Plus, editing software such as Adobe Lightroom and Photoshop Camera Raw have powerful noise reduction tools built in. (Just be careful not to overuse these tools, as they can give your images an artificial or ‘mushy’ appearance when set too high).
Choose an aperture that gives your shots some breathing room
Aperture is the f-stop setting on your camera that controls how wide the lens opens to let light in. It also affects depth of field, which is how much of the image appears sharp from front to back. If your aperture is too wide, for example, a low f-stop setting such as f/2.8 or f/4, you might get the bird’s head sharp but lose focus on the wings or body.
A practical range for bird photography is around f/5.6 to f/8, just as a starting point. This gives you enough depth of field to keep more of the bird sharp while still allowing decent background separation.
If the light drops, you can open the aperture further (to f/11 or higher), but f/5.6 to f/8 is a great place to begin.
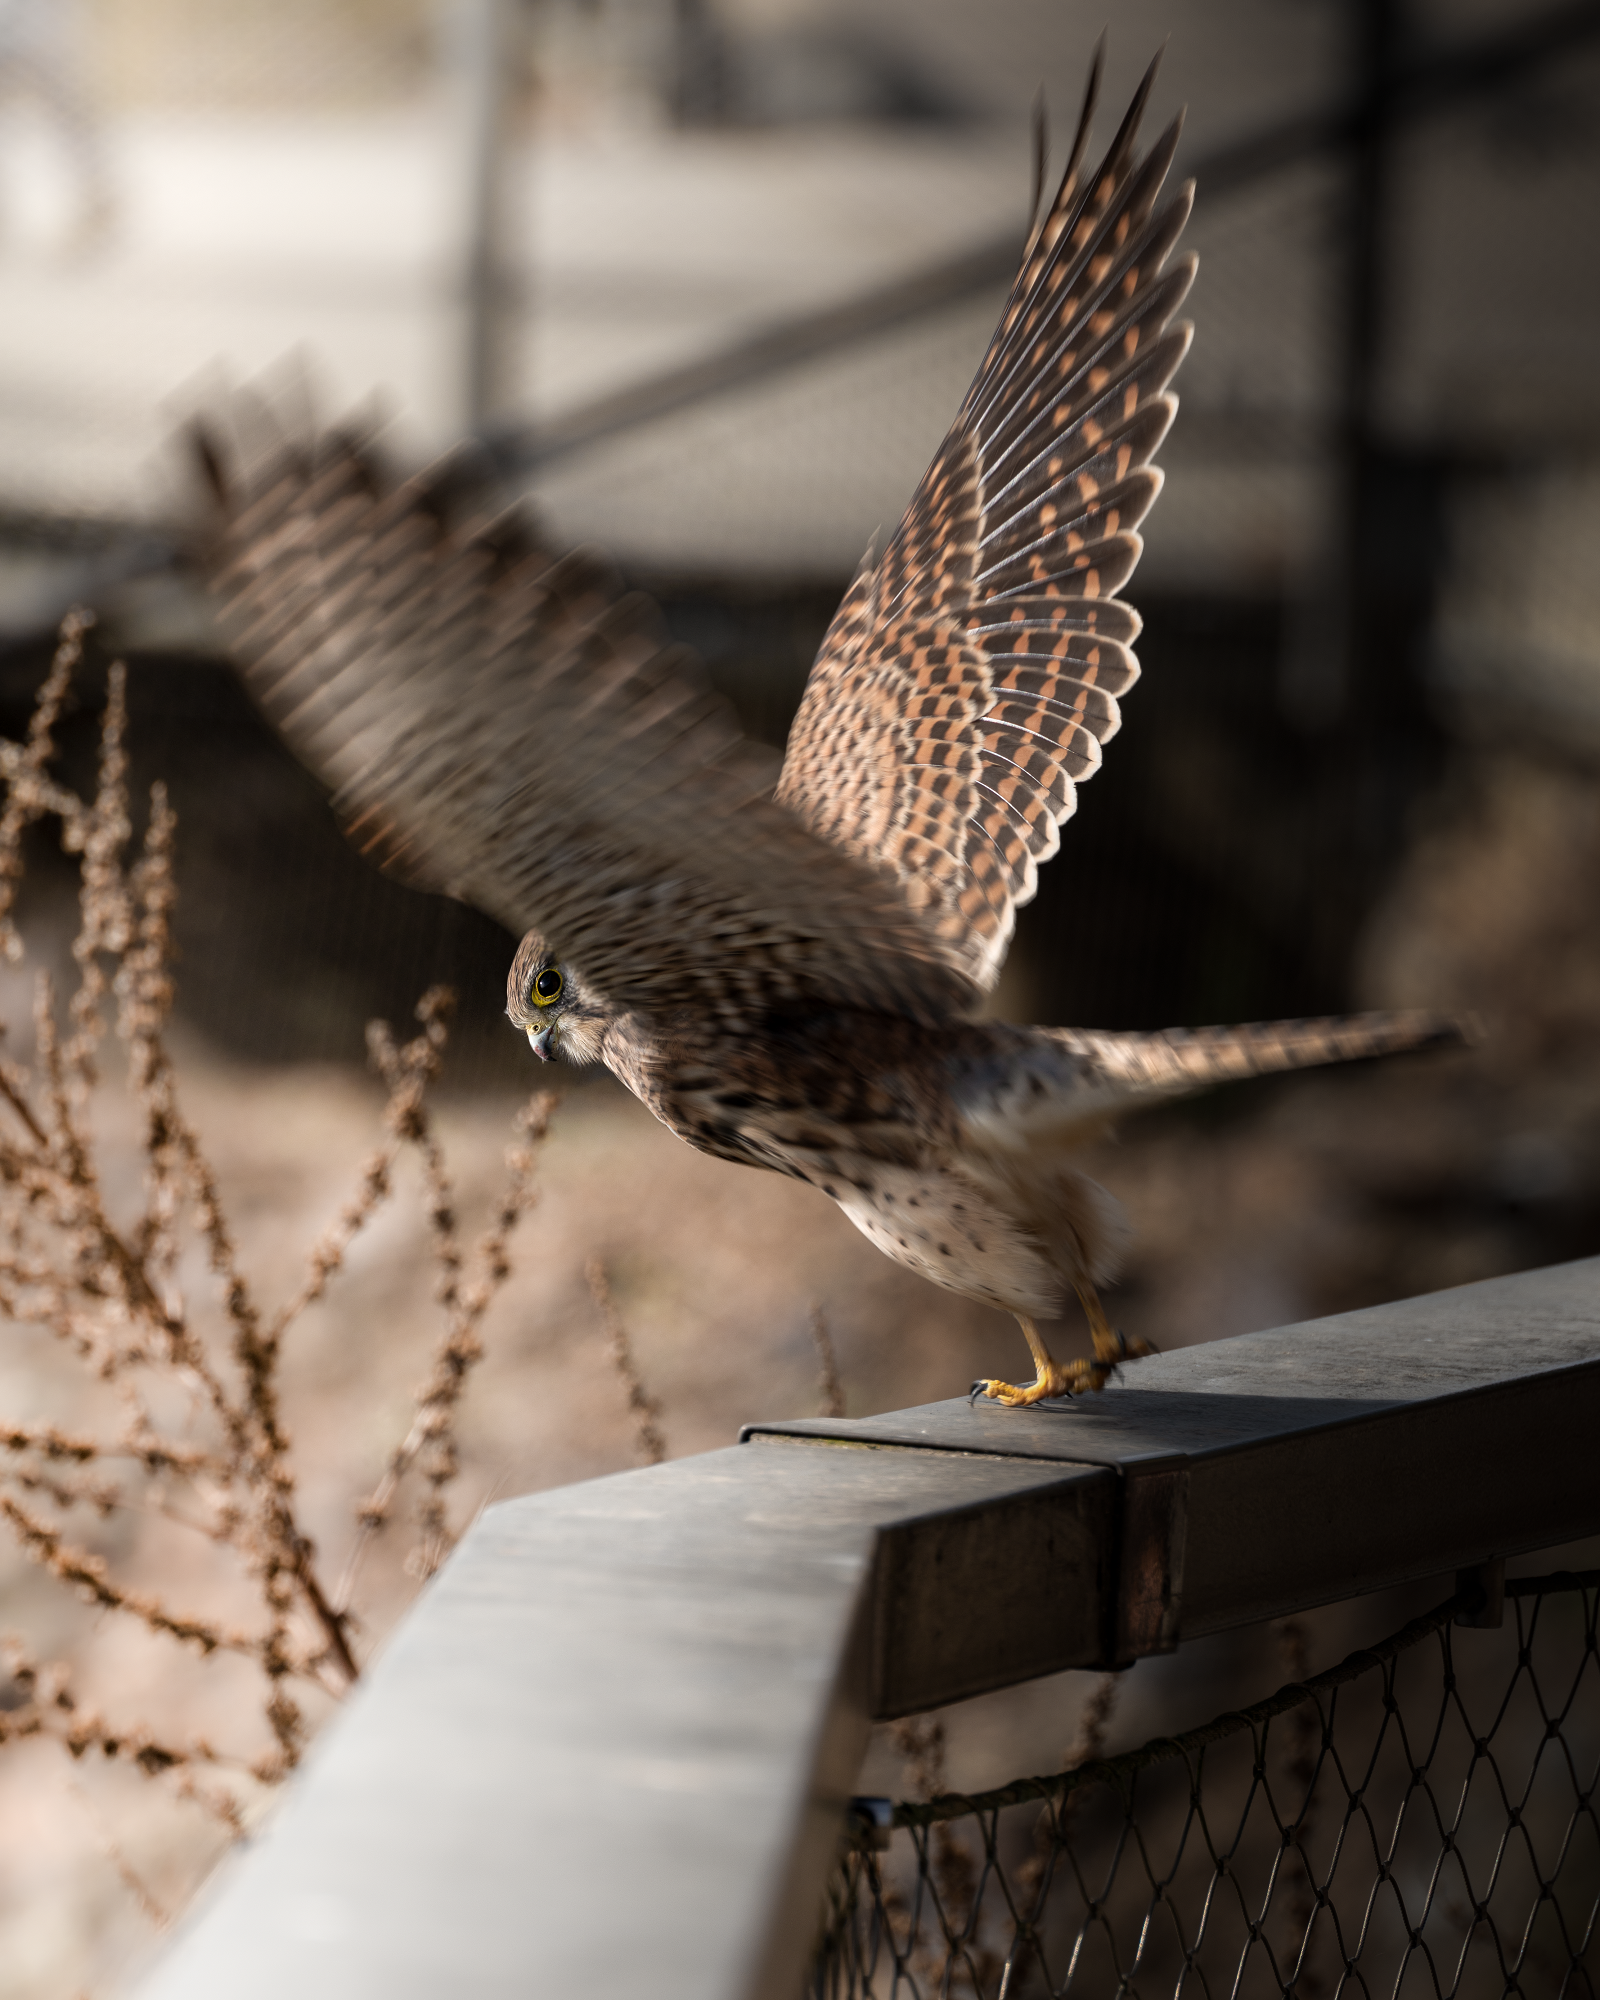
One of my favourite birds to photograph, a female european kestrel (falco tinnunculus). Taken with an aperture of f/2.8, this is an example of how a shallow depth of field focuses on just a limited slice of your frame. Image © Matt Garnett 2024
Experiment wth continuous autofocus
Of course, because birds don’t move in predictable straight lines, your camera needs to constantly update focus as the subject moves. For that reason you should try to get comfortable using continuous autofocus.
Depending on your camera brand this mode will be called:
AF-C on Nikon and Sony cameras
AI Servo on Canon cameras
In general, using this mode means your camera continually refocuses as long as the shutter button is half pressed. On modern mirrorless cameras, continuous autofocus has become significantly more advanced. Cameras like the Sony A9 series and Nikon Z9 use AI subject detection and tracking systems that can recognise birds and even detect their eyes in flight. Instead of simply adjusting focus based on distance, these cameras analyse the subject across the frame and continuously track it as it moves.
Experimenting with your shutter speed and aperture settings can help you explore different approaches to wildlife photography and find your own stylistic preferences. Image © Matt Garnett 2023
Try back button focus
A bit more advanced, many wildlife photographers prefer to use back button focusing when shooting birds in flight.
With this technique, focus is assigned to a button on the back of the camera instead of the main shutter release button. This separates focus from the shutter release, essentially preventing the camera from refocusing when you press the shutter button to take a photo.
The advantage here is that you can lock focus when needed, track subjects more easily, and avoid the camera accidentally refocusing when you don’t want it to.
It takes a bit of practice to get used to, but back button focus can make tracking birds much easier and is also useful in many other styles of photography.
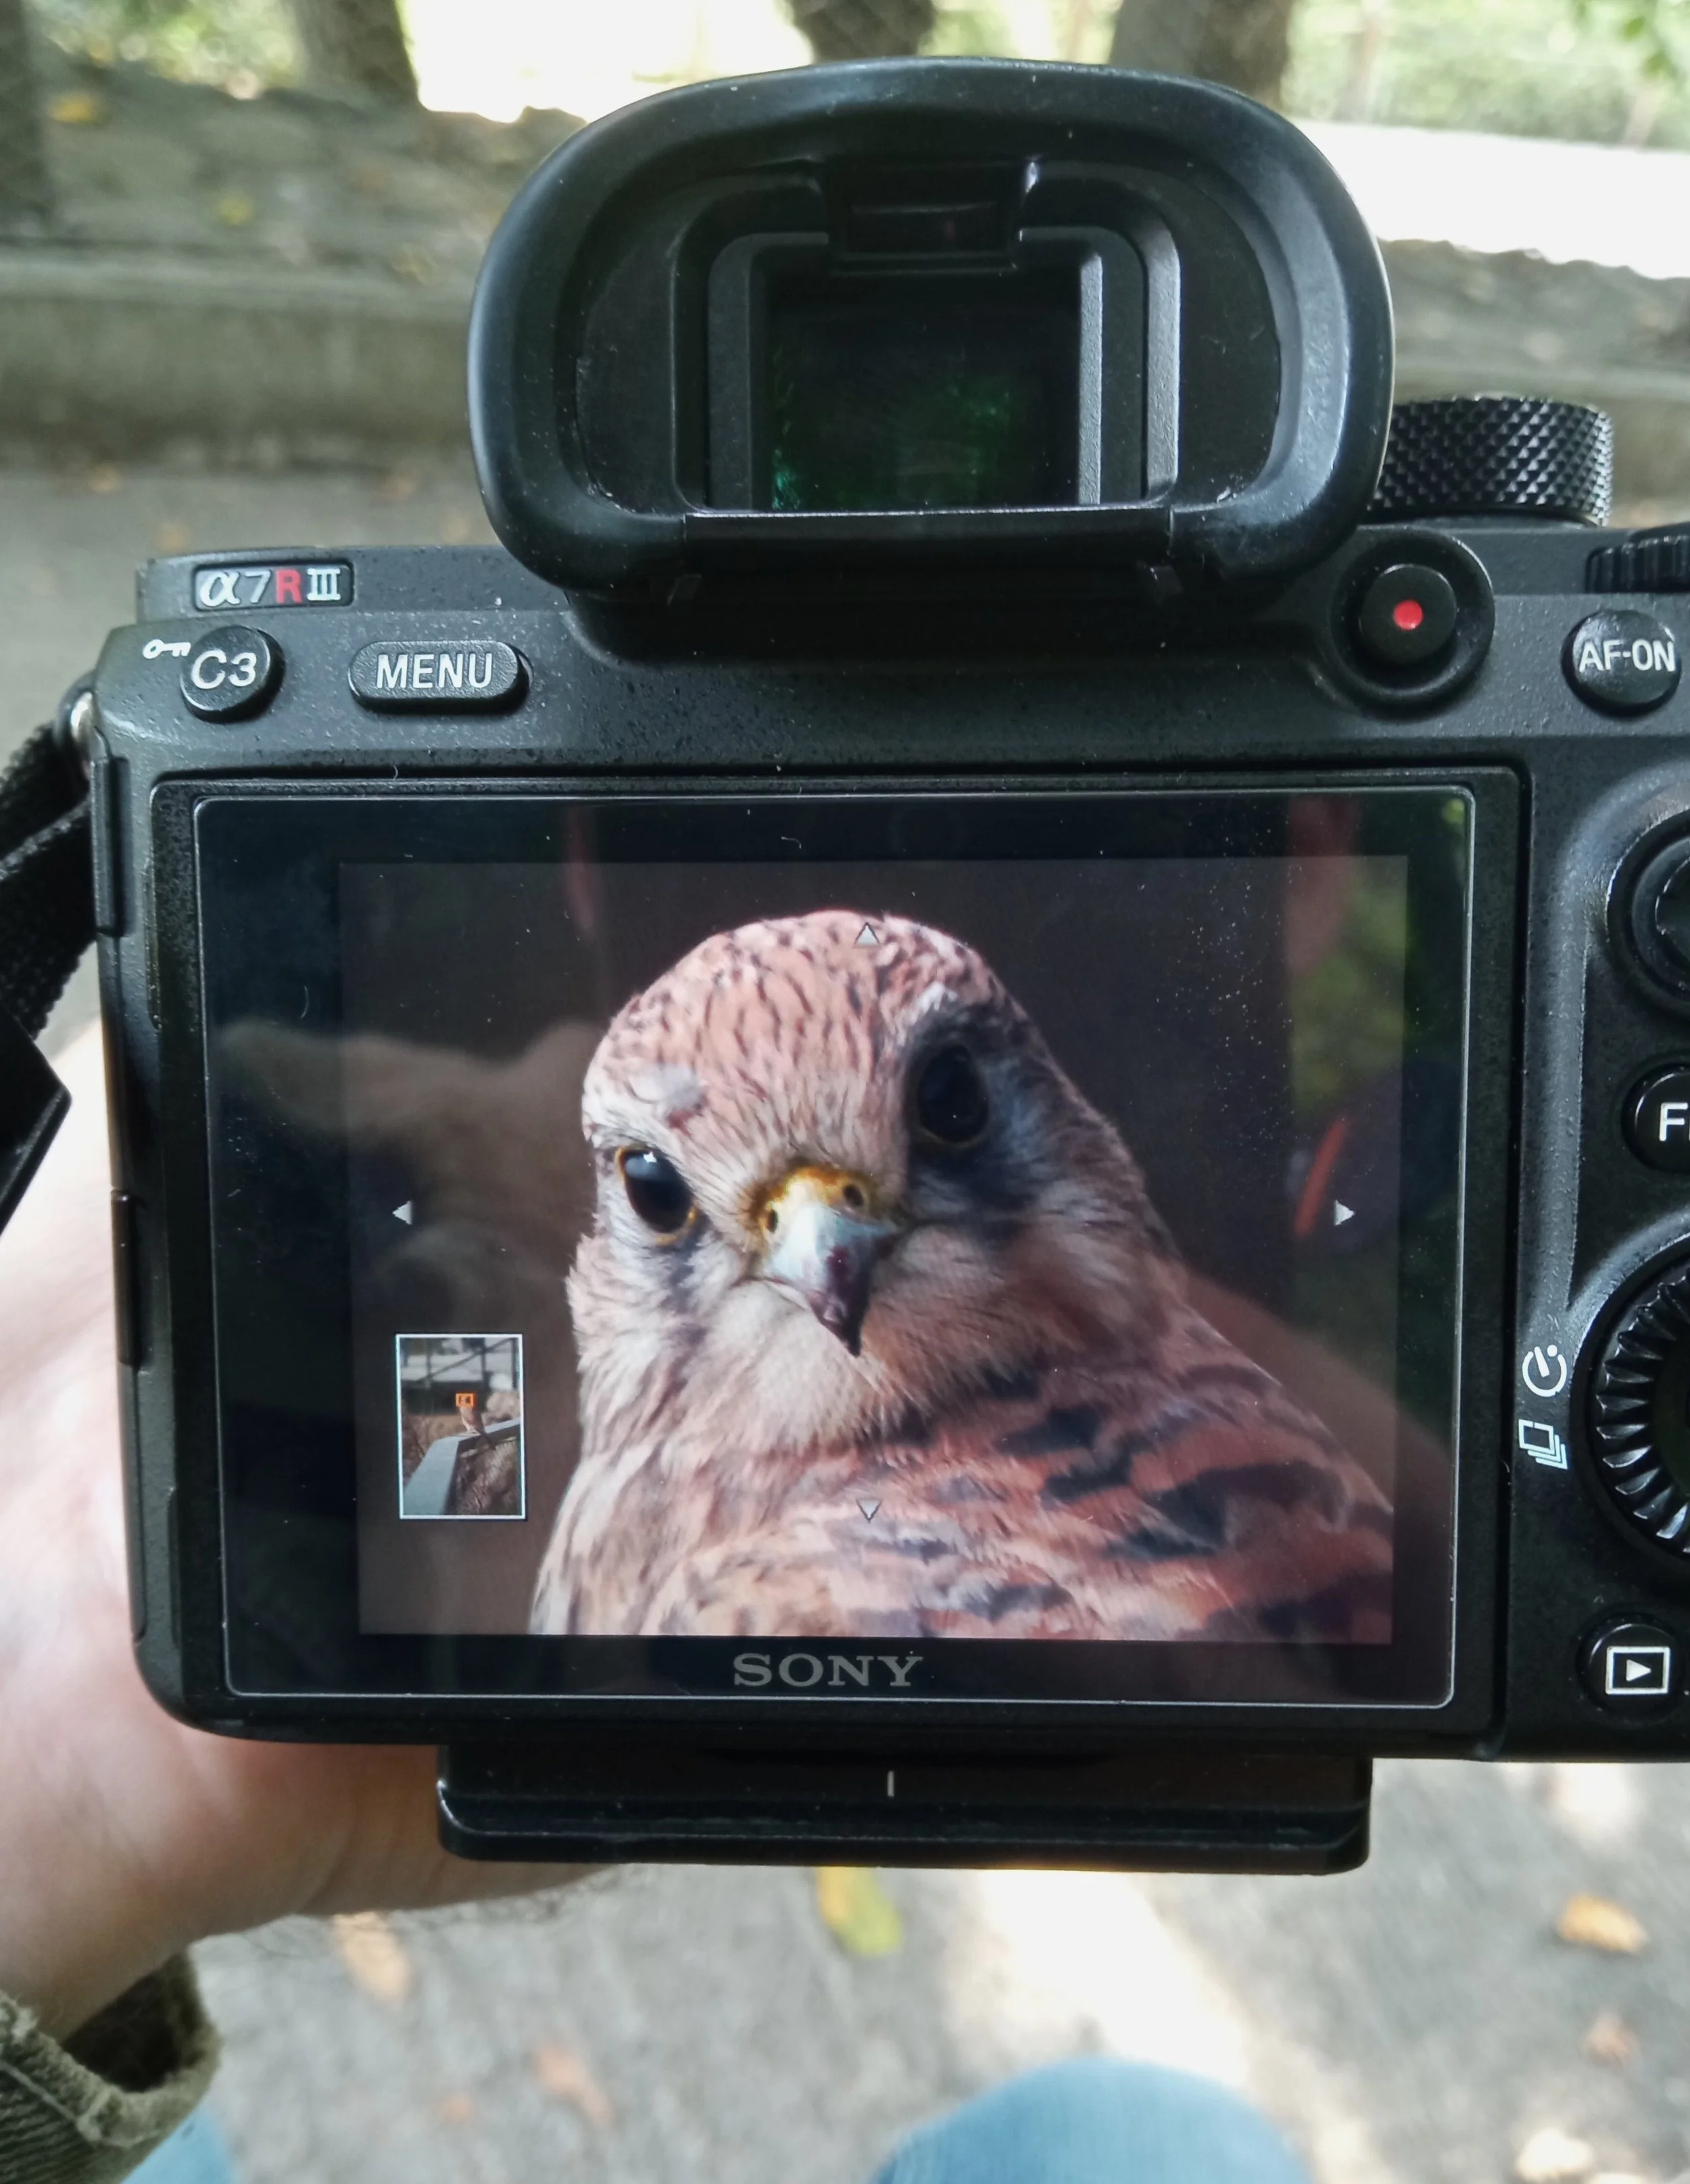
On my Sony A7RIII the C3 back button is a useful place to assign back button focus. Image © Matt Garnett 2023
Pick a location where birds are active
Most importantly, bird photography starts with choosing the right location. Once you arrive somewhere promising, take a few minutes to simply watch the birds. Look for patterns in how they move and where they tend to settle.
Try to position yourself so you are roughly level with the bird you want to photograph, rather than shooting steeply up or down. Eye-level angles usually produce more natural and engaging photographs.
One thing to remember is that interesting wildlife can turn up in all sorts of unexpected places, especially in urban settings. In my hometown of Prague in the Czech Republic I’ve seen owls in supermarket car parks, peregrine falcons flying around building sites, and grey herons and cormorants perching on the roof of my apartment building. The ‘rule’ here is to tune your eyes to bird behaviour in your everyday life, because the most interesting photographs are often hiding in plain sight.
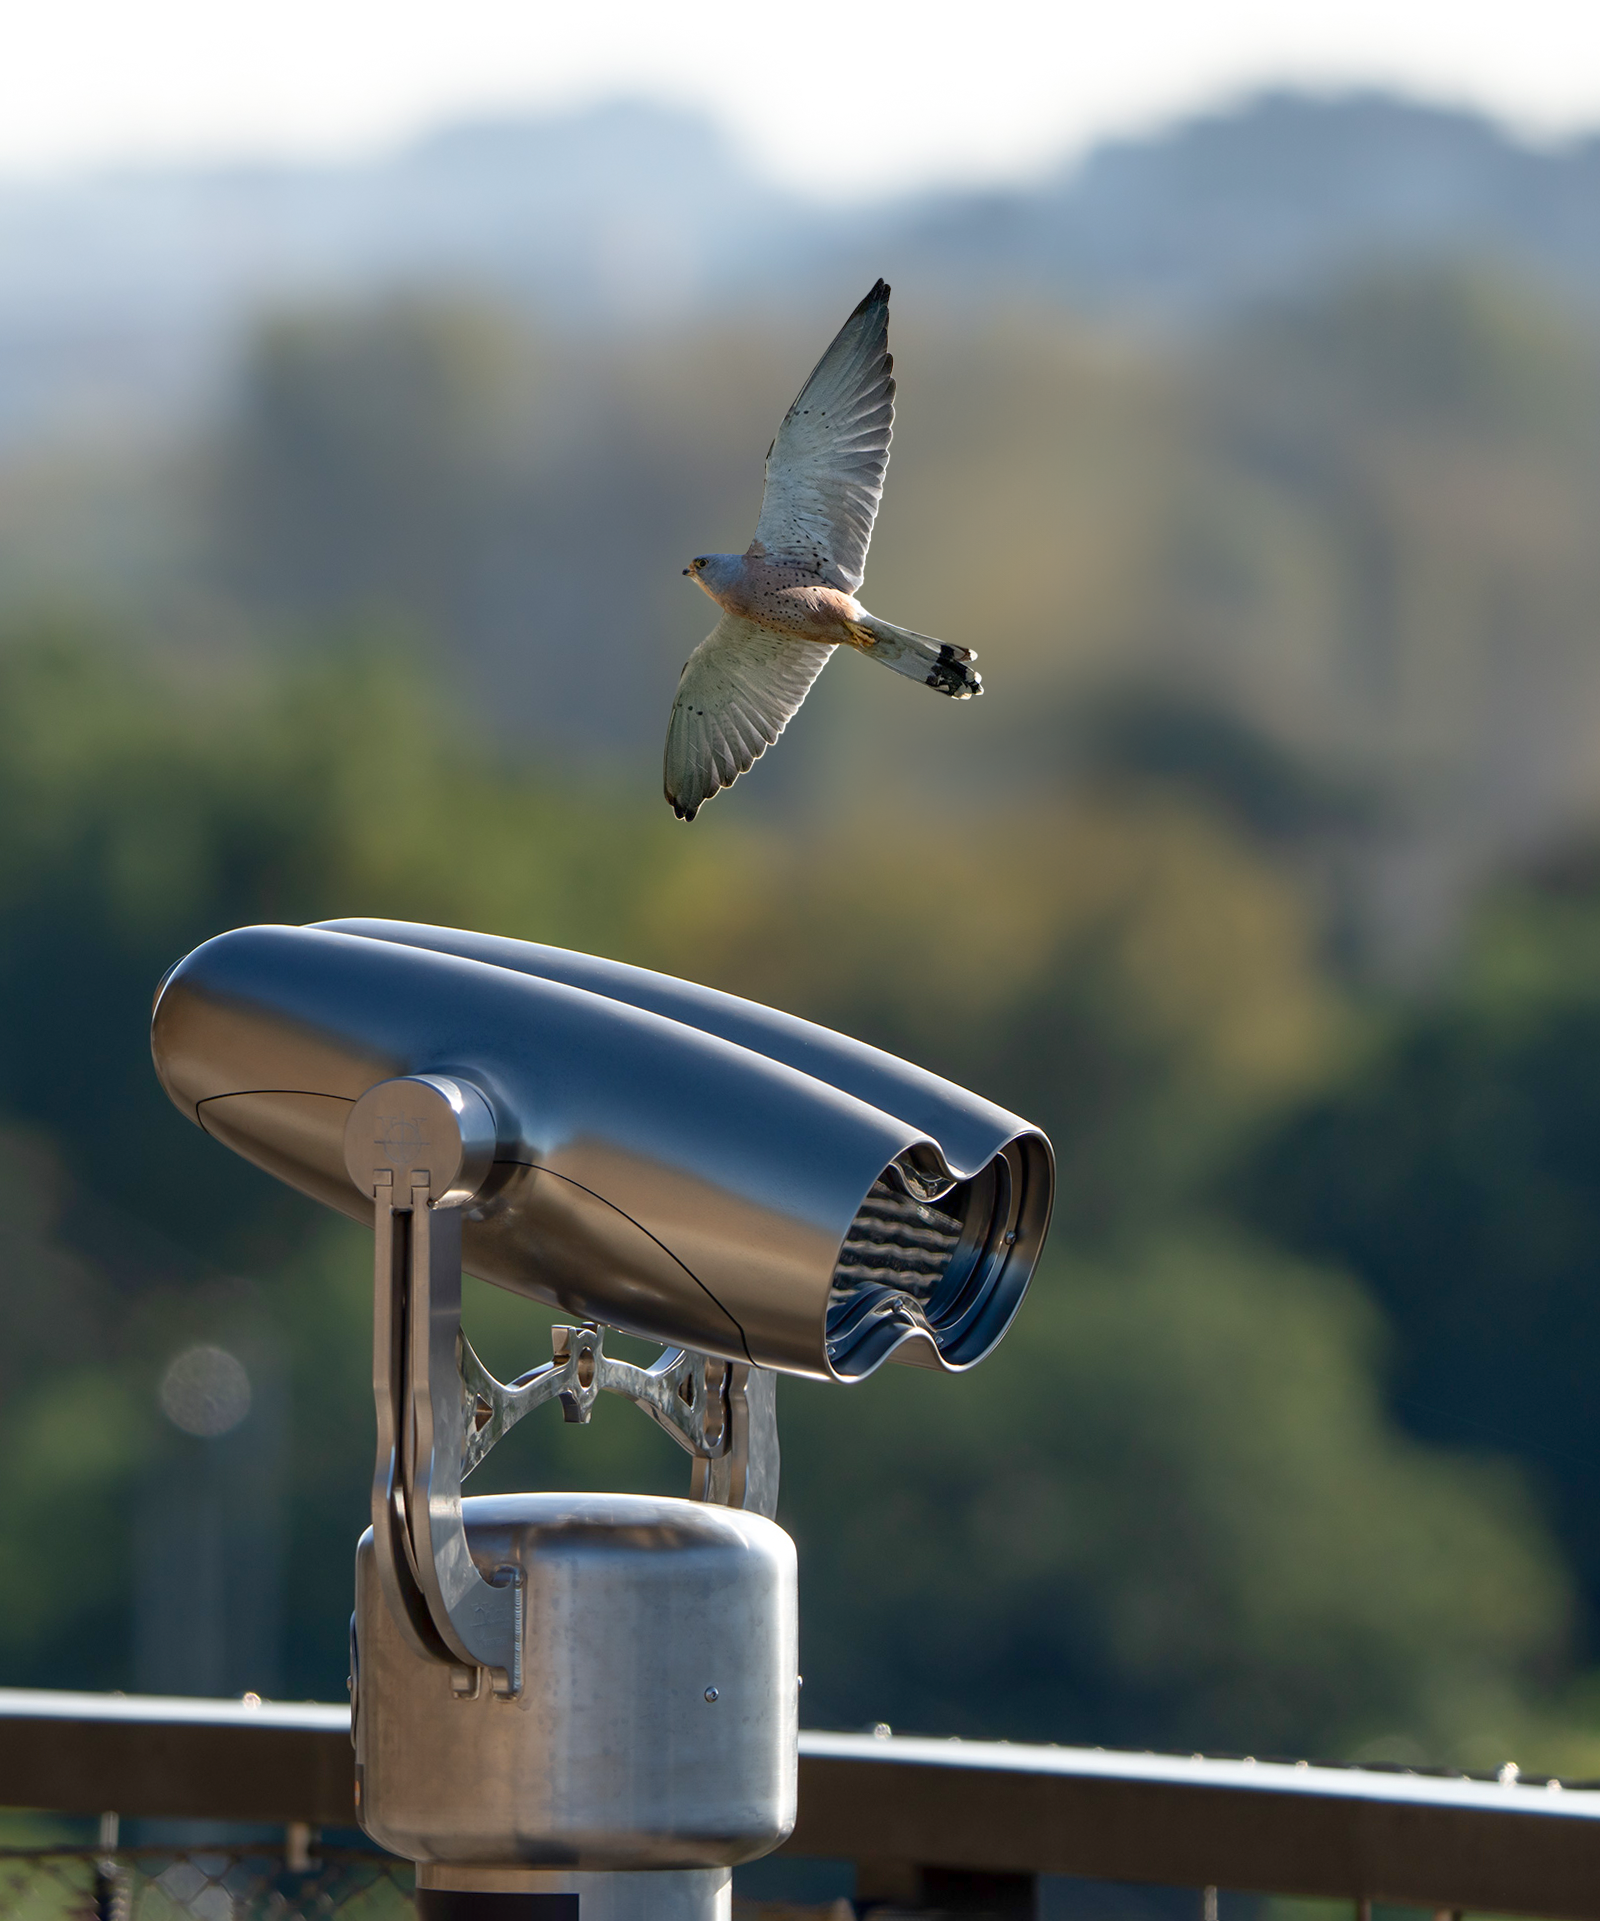
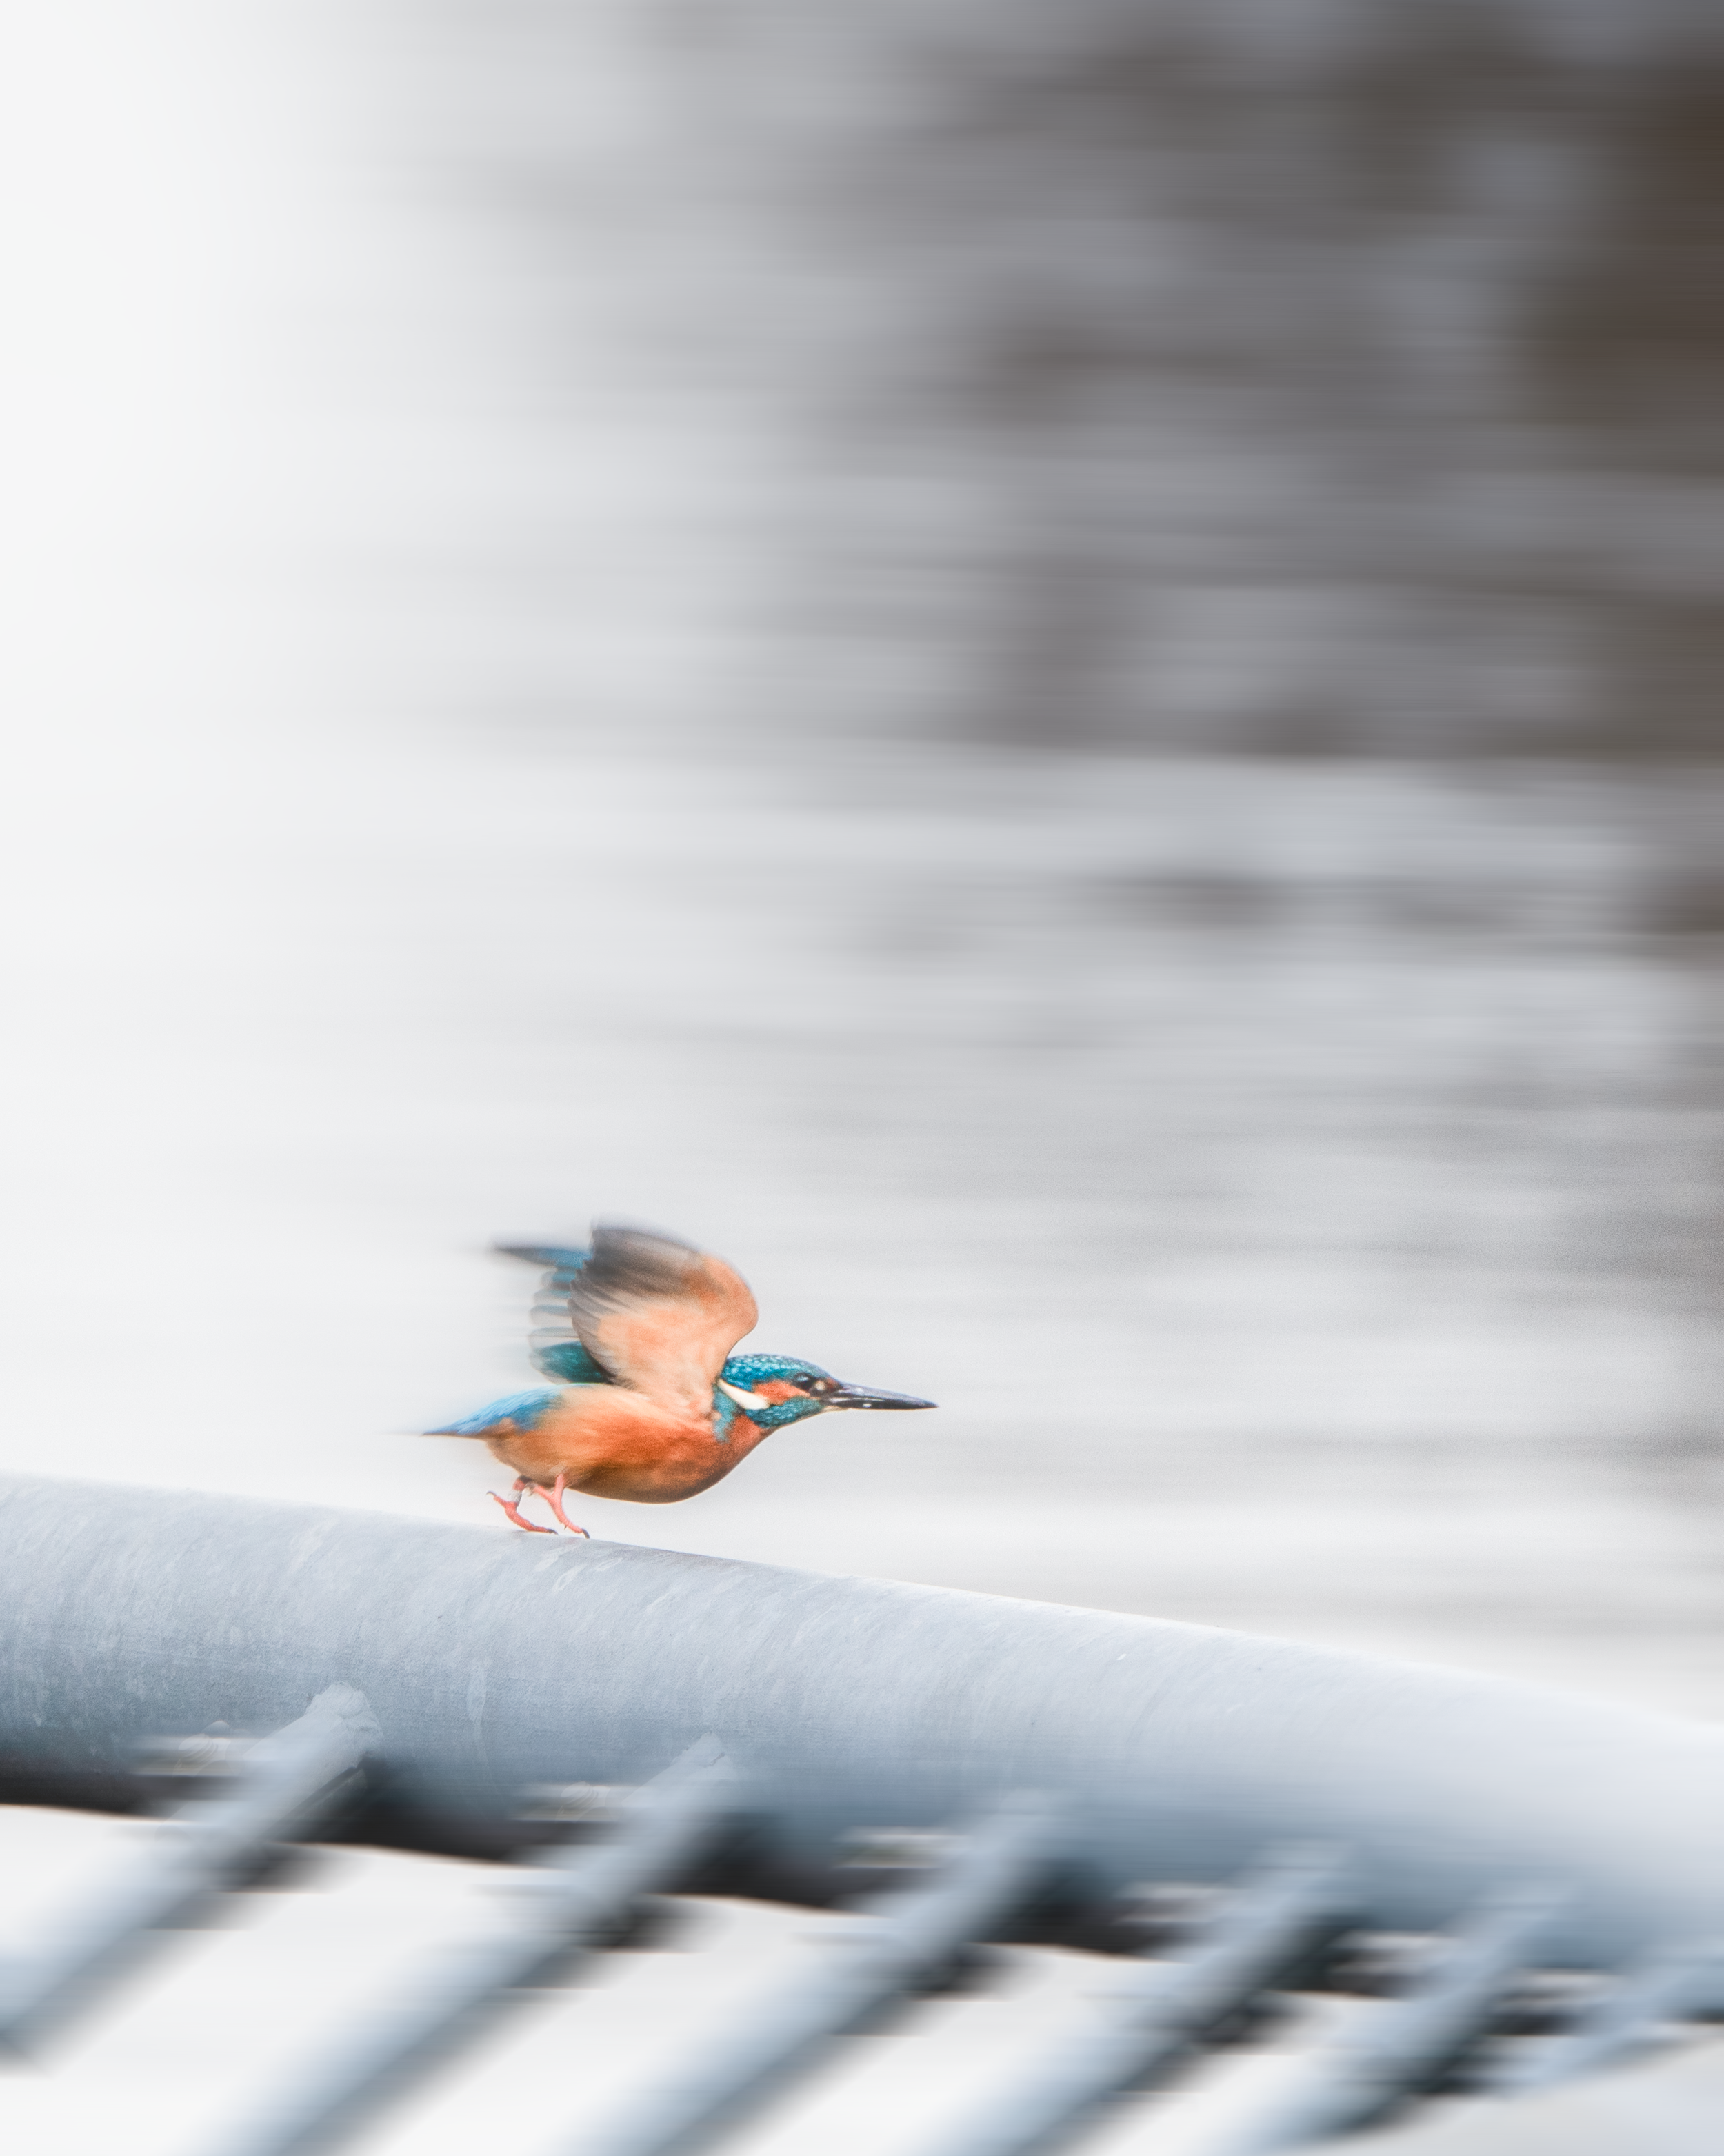
A male kestrel in flight in Prague, Czech Republic. Image © Matt Garnett 2023
Learn to observe bird behaviour
Wth that said, I believe that one of the most underrated skills in wildlife photography is patient observation. When you spend time watching birds you’ll also start to notice small behavioural patterns that make photography easier. Many birds follow fairly predictable routines. Small passerine birds (perching birds like tits, robins, sparrows, etc.) often stay within a relatively small territory of a few hundred square metres, moving between the same perching or feeding spots again and again.
Larger birds can show similar patterns. Seabirds frequently follow consistent flight paths when returning to nesting cliffs, and you can often spot raptors such as kestrels hovering over preferred hunting sites at specific times of the day. Learning to recognise these patterns makes it much easier to anticipate where a bird will appear next, rather than reacting at the last second.
Look out for for simple backgrounds
Autofocus systems work best when there is clear contrast between the bird and the background. A bird flying against a clean blue sky is much easier for your camera to track than one flying across busy foliage or cluttered scenery.
If possible, position yourself so that birds fly across simple backgrounds. This will improve both focus accuracy and the overall look of your images.
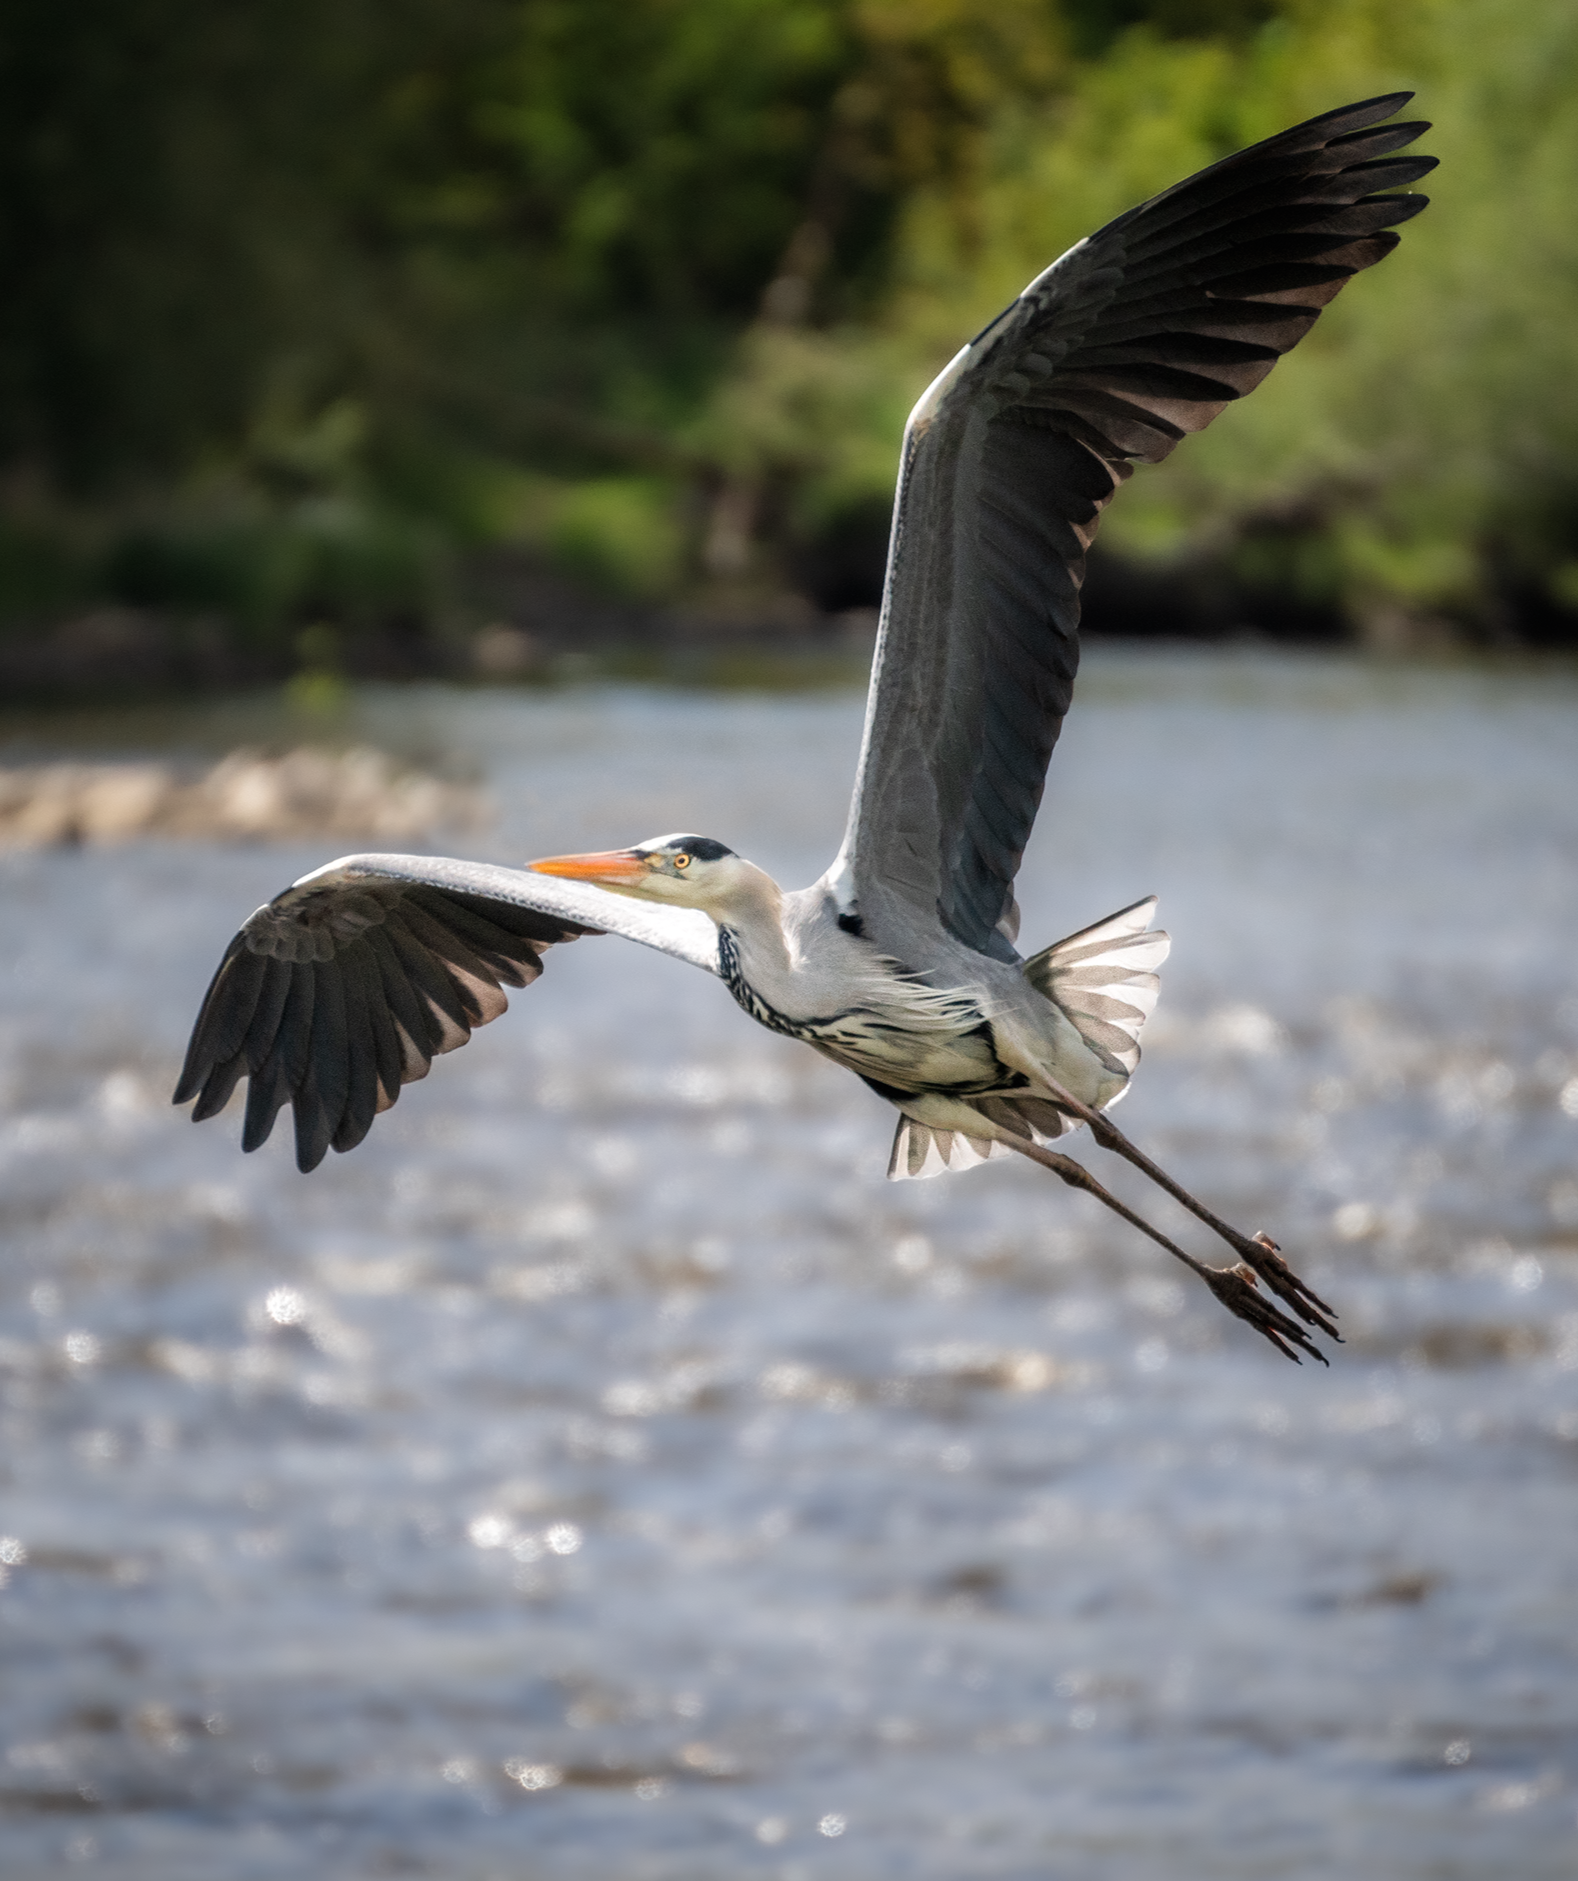
Here the grey heron (ardea cinerea) is gliding at the midpoint between my position and the background. This keeps the background just soft enough without becoming overly blurred. Taken with settings at: 1/1500 sec; f/5.6; ISO 400. Image © Matt Garnett 2024
Practice really is the most important (and fun) part
For me, there is no substitute for time spent photographing birds. The act of slowing down, observing wildlife, and tuning in to your surroundings is a great natural stress reliever. In recent years birdwatching and bird photography have become increasingly popular, and it is easy to understand why. A lot of us are looking for ways to step away from a life of constant screen notifications and spend our free time in a more nature-oriented and spiritually fulfilling way. Personally, even on days when the photos are not happening (which are many), just the experience of being outside and observing birds brings me huge amounts of satisfaction.
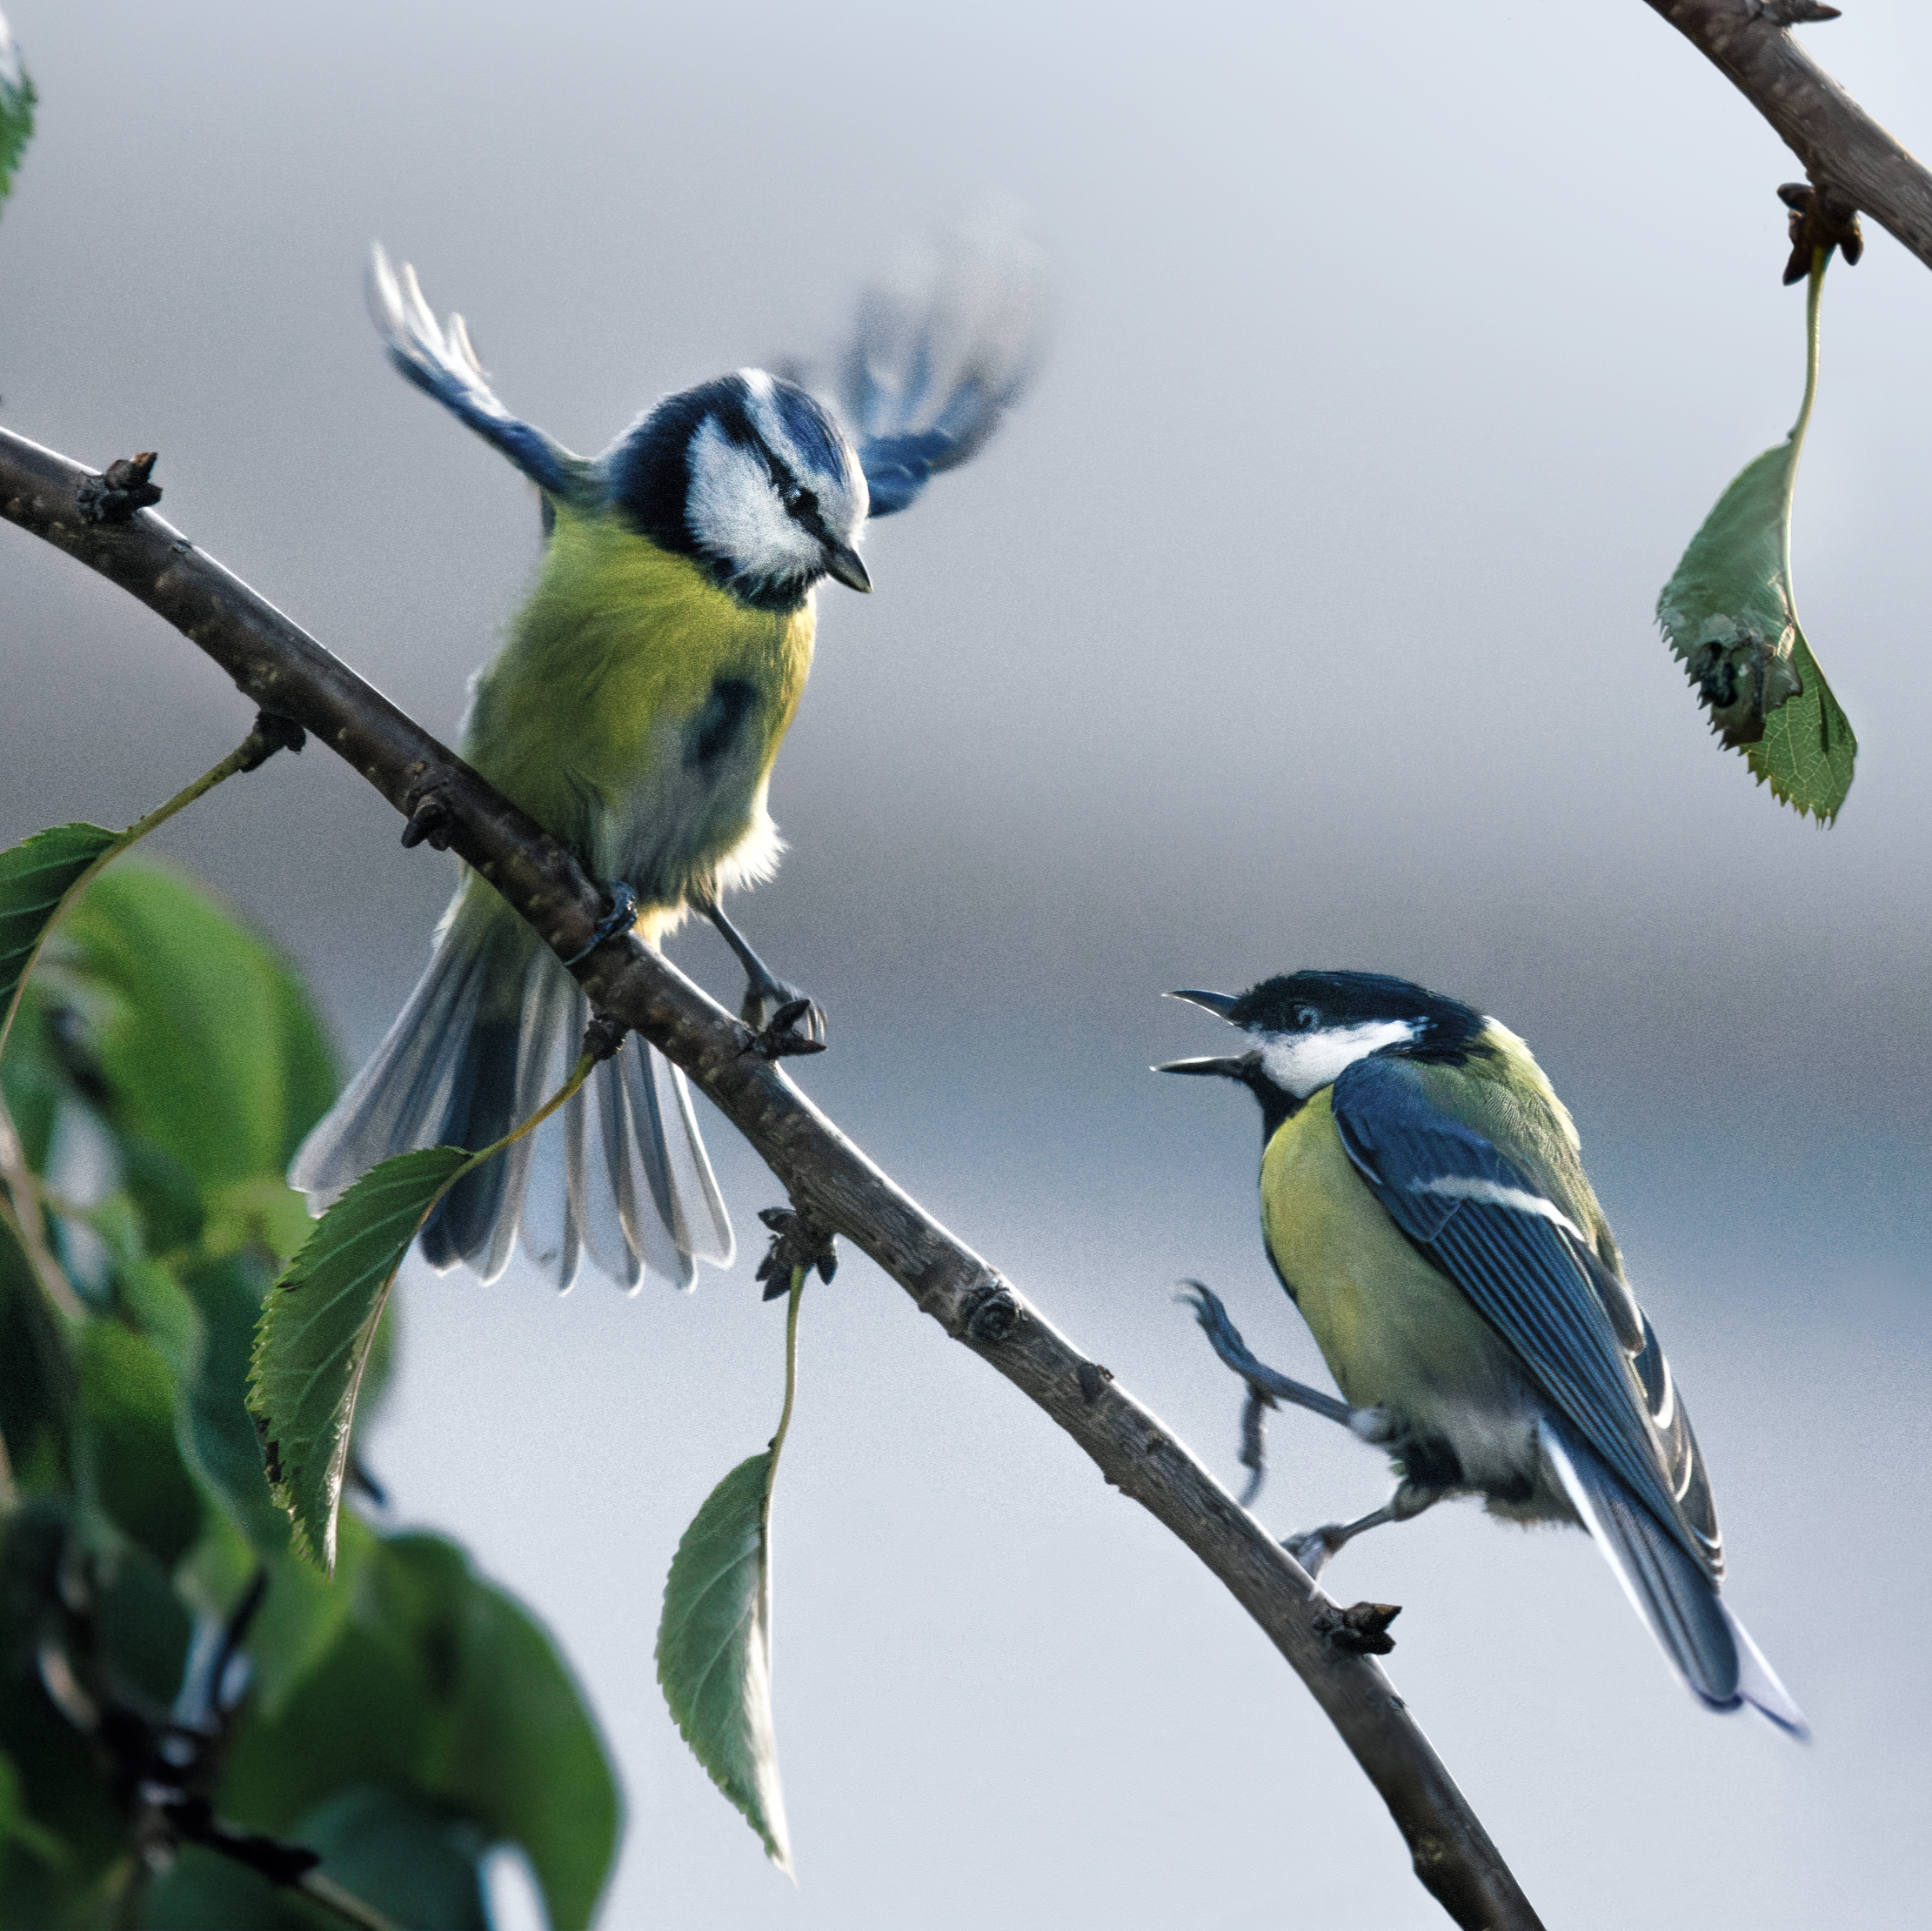
Image © Matt Garnett 2023
It’s also important to remember that all of the settings and suggestions here are simply a starting point. If you’re anything like me, you’ll get some of your most interesting images when things don’t go exactly to plan. A shutter speed you thought was too slow, unexpected light, or a moment where the bird moves in an unpredictable way can sometimes lead to a far more creative photograph than the one you had in mind. Try not to get too absorbed in constantly checking the back of your camera or worrying about every technical detail. Keep an open mind, stay curious, enjoy being outdoors, and give yourself the freedom to experiment. Best of luck!